Since I blew most of my repair money for the year getting my Prodigy fixed, I decided to do the work on the OSCar myself. I have opened and disassembled and cleaned a few keyboards in my time, but the OSCar is not one of them, and to say I approached this with some trepidation is an understatement.
It is my most beloved synth, but many of the keys had gotten intermittent or weren't working at all, and many of the pots were scratchy. The pots by themselves wouldn't normally mandate such an operation, but the OSCar uses the keyboard for a variety of other tasks besides playing notes, such as selecting sounds/programs, so for it to go south was not something I could leave unattended.
So, I scoured the web looking for any kind of documentation regarding disassembly, cleaning, repairs, etc....NOTHING. I could not find a single reference, even at Mark Cottle's excellent OSCar Website. On all of the worldwide web, not even an electronic sausage about how this beastie was put together or how to take one apart. I knew they were rare, but damn...
With that said, I knew if I proceeded slowly and logically and took lots of photos along the way, things would probably work out. I was generally right, and naturally there were some surprises and frustrations in the course of things, but in the end the synth played and sounded better than it ever has before.
So join me in this little photographic odyssey of the deconstruction, cleaning, and rebuilding of a classic synth.
______________________________
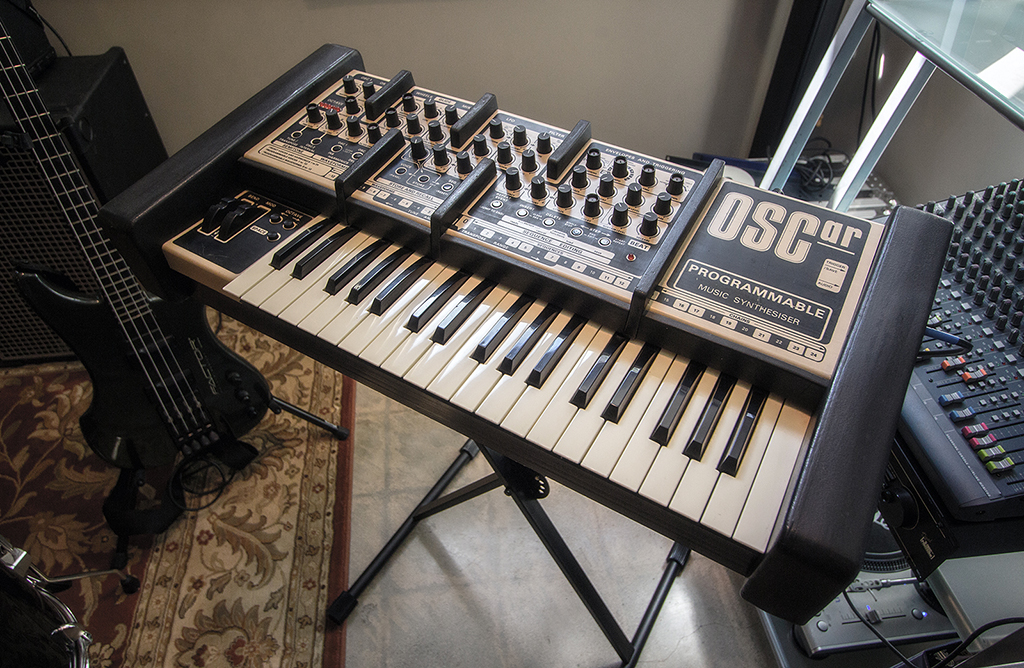
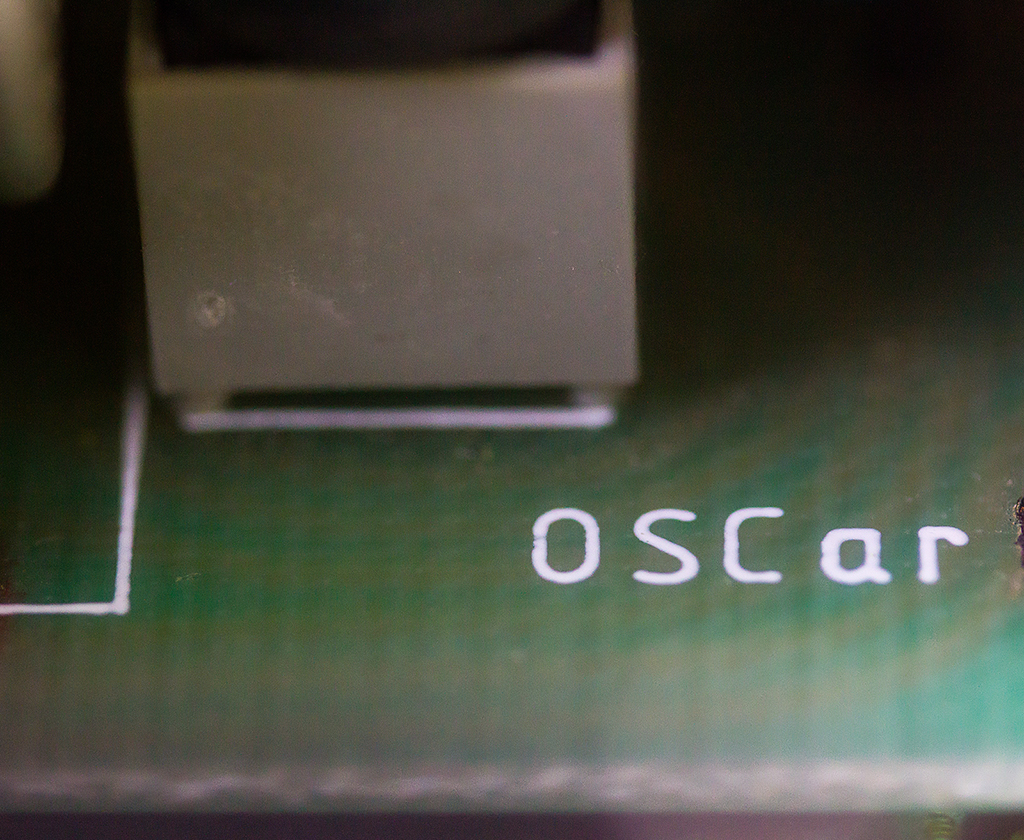
1. Meet OSCar.
Only about 1500-2000 were produced by the Oxford Synthesizer Company in the UK between 1983-1985, this one is SN#0488L (written in pencil on the underside.) It was one of the first synths to have DCOs, MIDI and a few other tricks up its sleeve. Parts are hard to find as you might imagine, so I *really* didn't want to break anything during this operation.
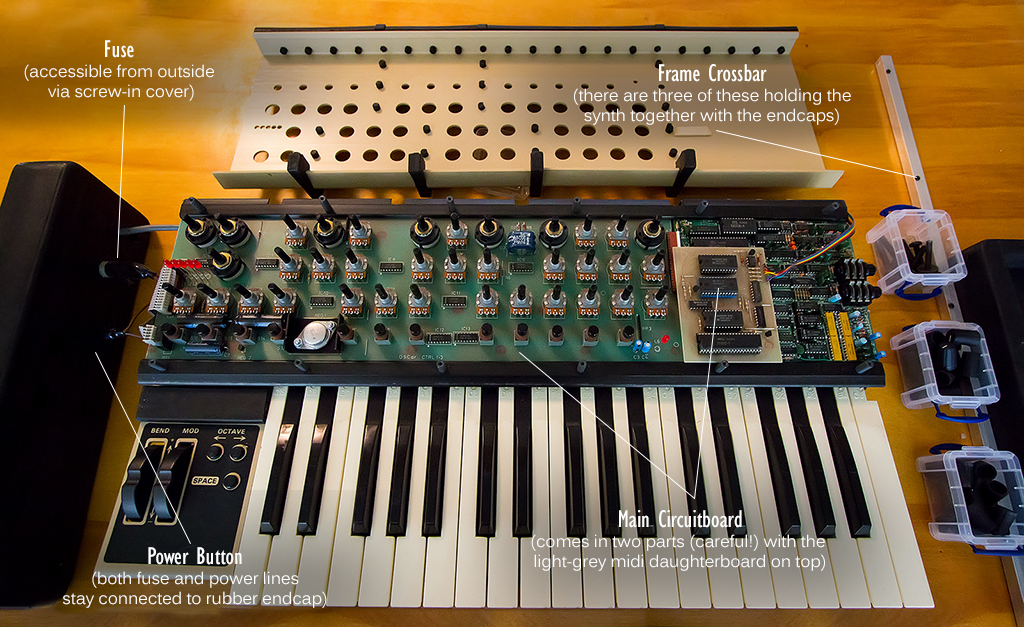
2. Initial Disassembly.
First, locate and remove the 8 large screws located (4 each) in the large black Rubber Endcaps. Then gently remove the endcaps, ensuring the fuse and power connectors on the left endcap do not separate from the endcap or the unit. Next, slide the long metal crossbar out from under the front of the cover. If you haven't removed all the knobs from the top of the unit, now would be a good time to do so! When that is done, simply lift up the front of the cover and gently push it backwards and down a bit to unhook it from its notch along the back frame, exposing the circuitboard.
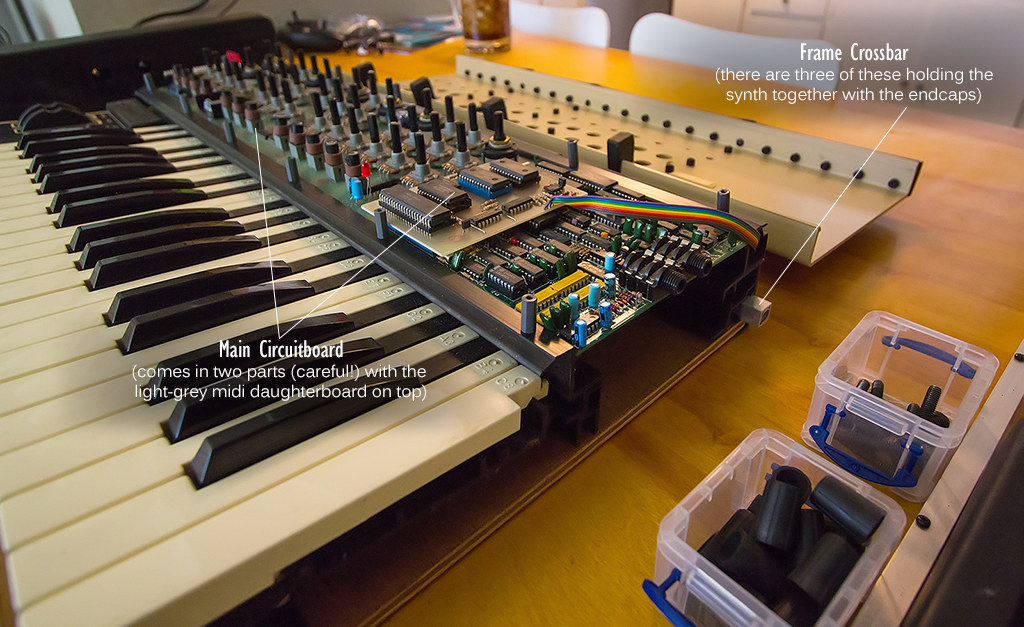
3. A Brief Look Around
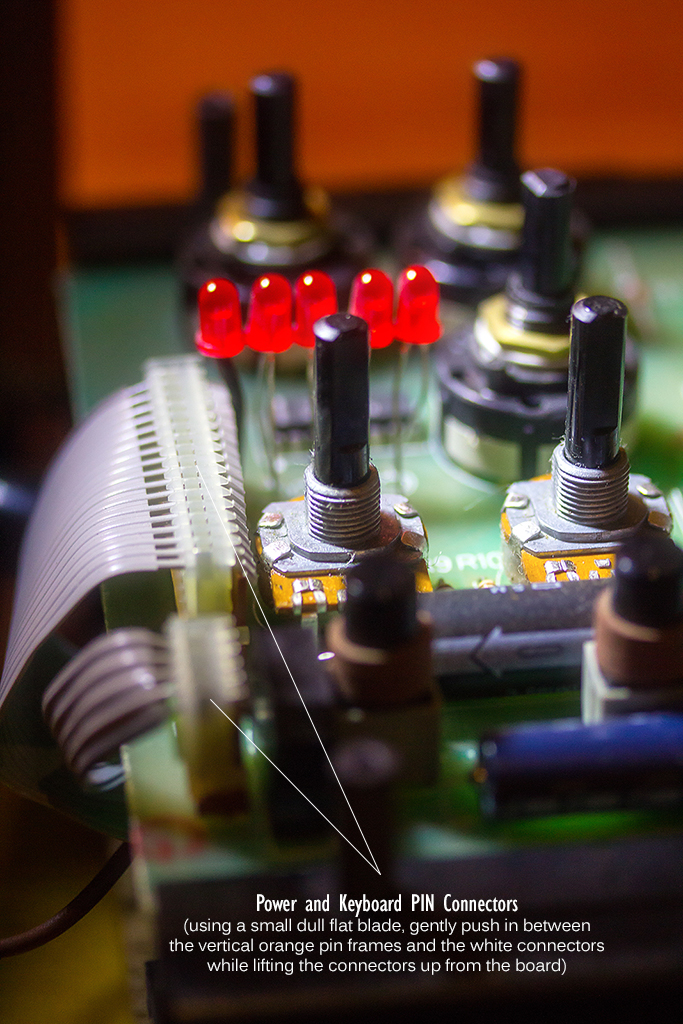
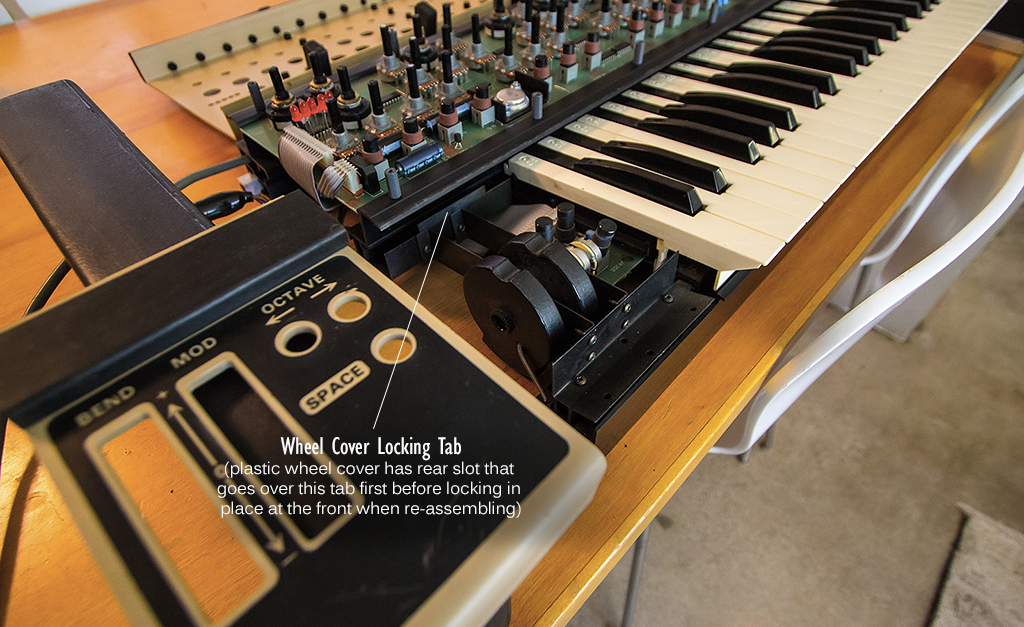
4. Removing Connector Cables and the Wheel Cover.
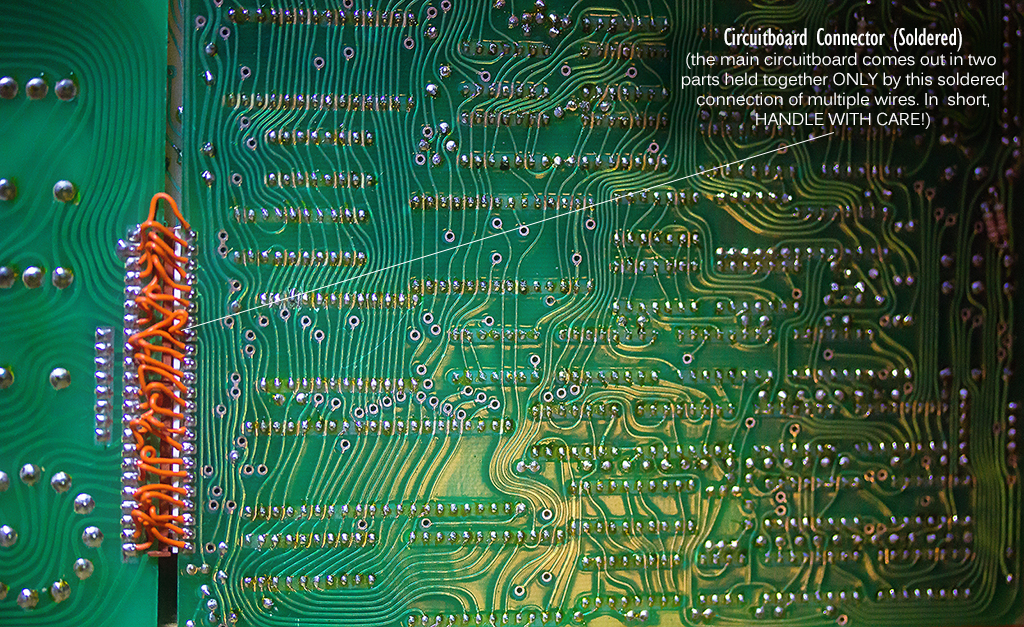
Before removing the keybed to service the J-Wires and Bus Bar, we must first disconnect the power and keyboard connector cables from the circuitboard. Next is the removal of the wheel cover plate, which is easily accomplished by simply pulling the front of the cover away and down a bit to separate it from the keybed.
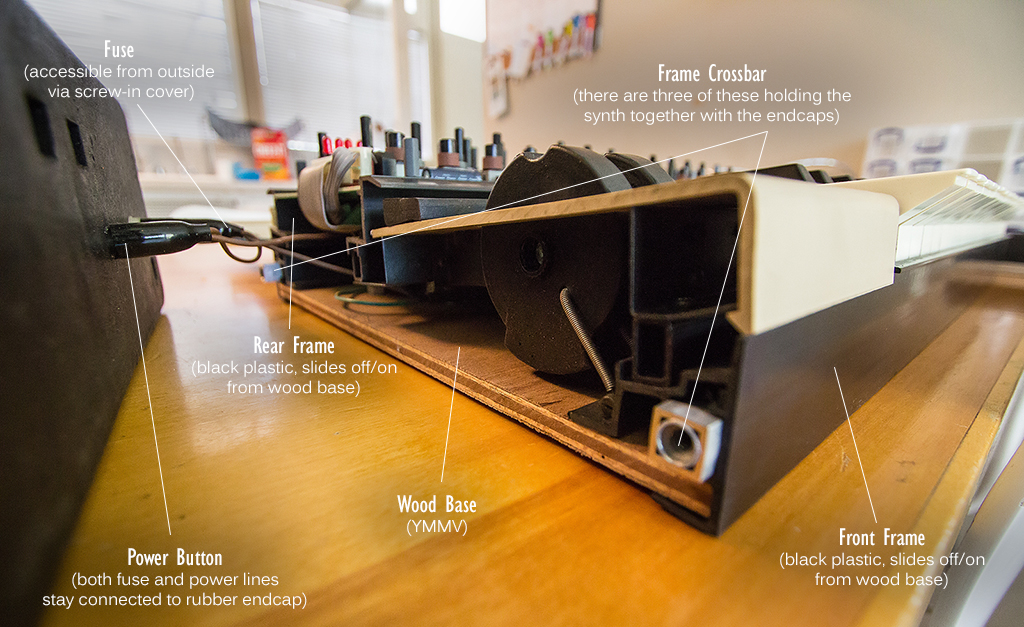
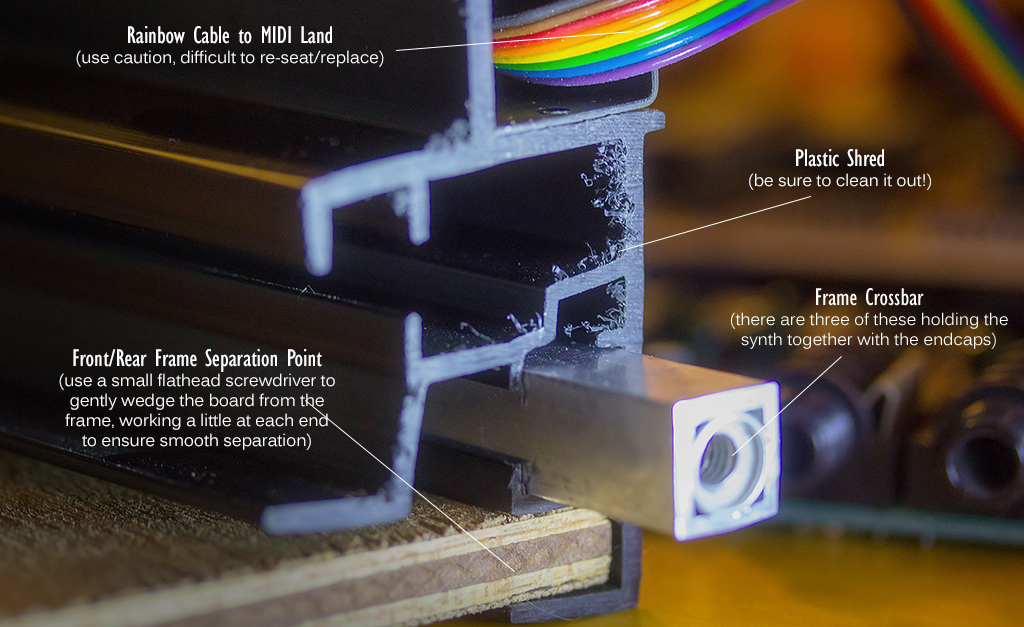
5. Removing the Keybed and Some Notes on Design.
I was not sure what to expect when I first cracked the case of the OSCar, but the layout and design of the synth are refreshingly simple, low-tech and even "organic" in some ways. It is definitely indicative of both its era and the independant nature of OSC! The bottom of the synth is simply a wooden board. I don't know if others are different but the wood is of a compressed laminar variety that has clearly withstood the test of time. I like it. The entire synth is held together by horizontal crossbars through the endcaps and front and back plastic frames which hold the circuitboard and keybed. Removing either the keybed or circuitboard is simply a matter of gently wedging a small flathead screwdriver between the edge of the wooden base board and the black plastic front frame groove that holds it, and wiggling back and forth slowly at each end until the entire frame comes free of the board. No screws, no attachments at all. Organic, like I said. There does not seem to be any need to remove the back frame unless you need to disassemble the midi port section.
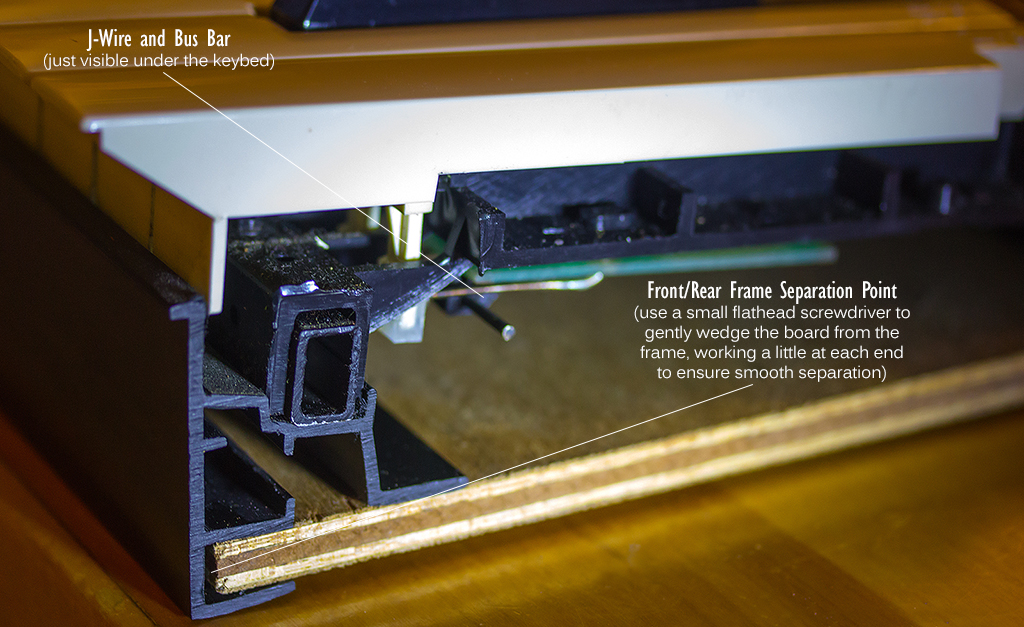
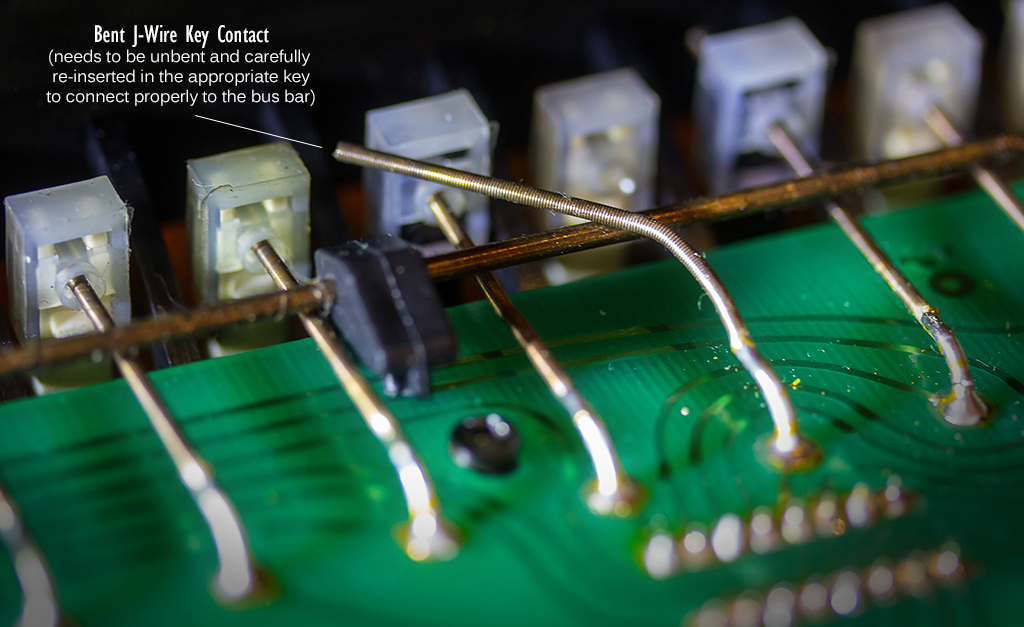
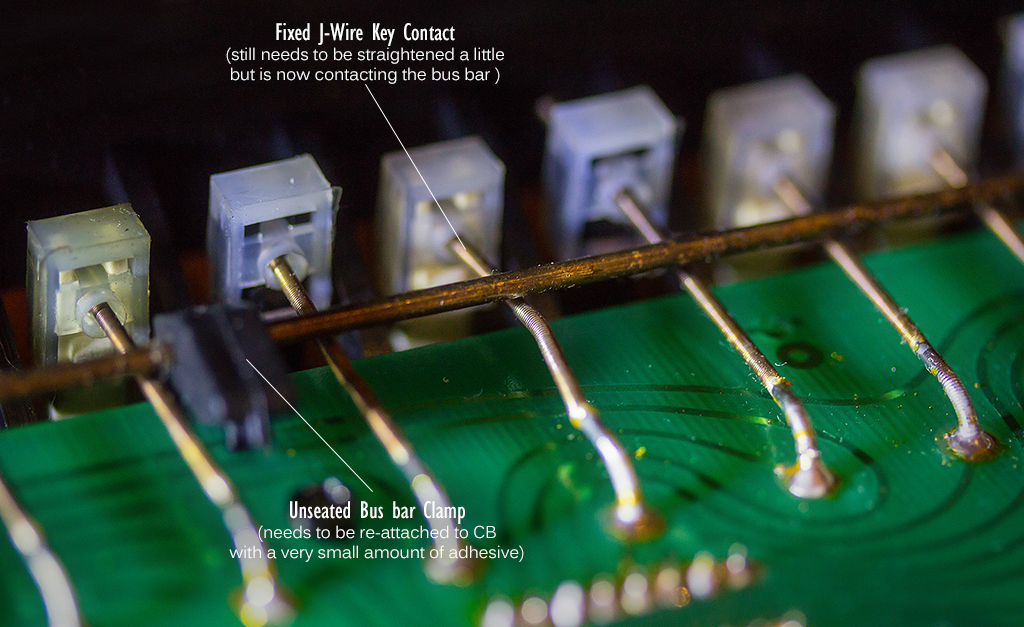
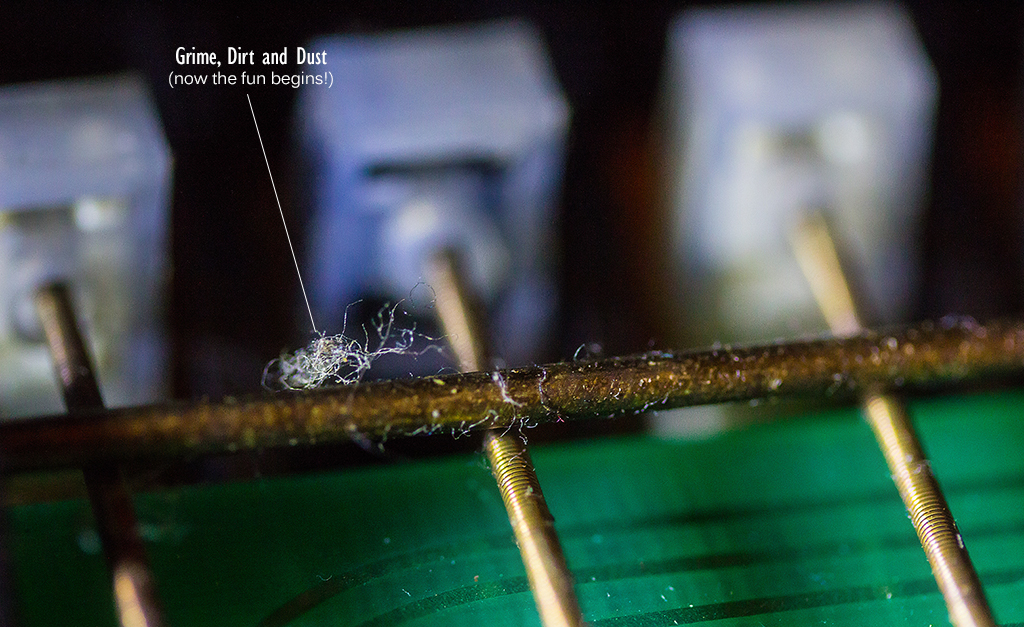
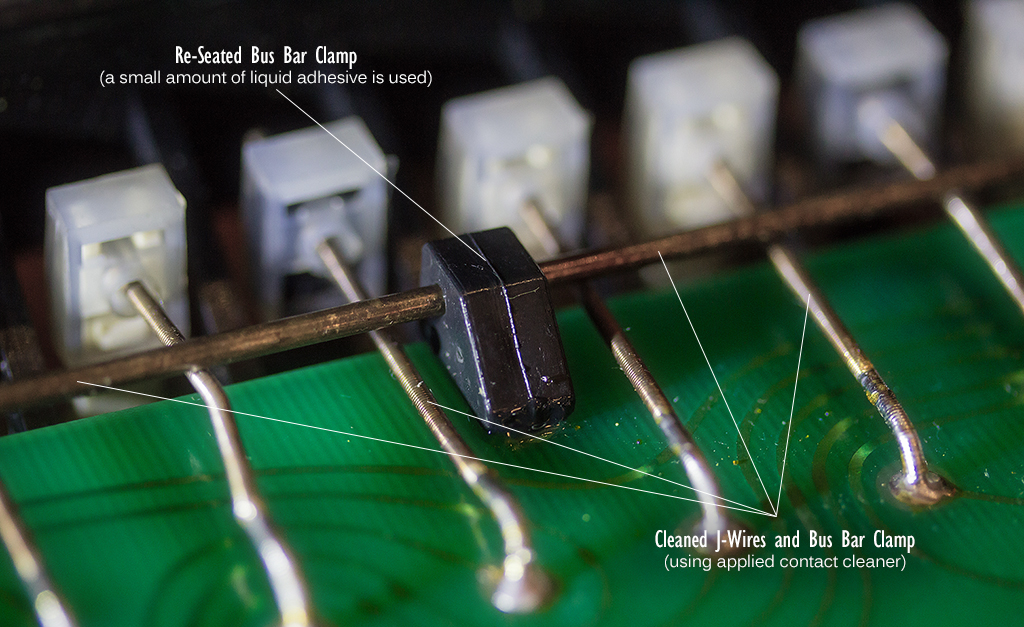
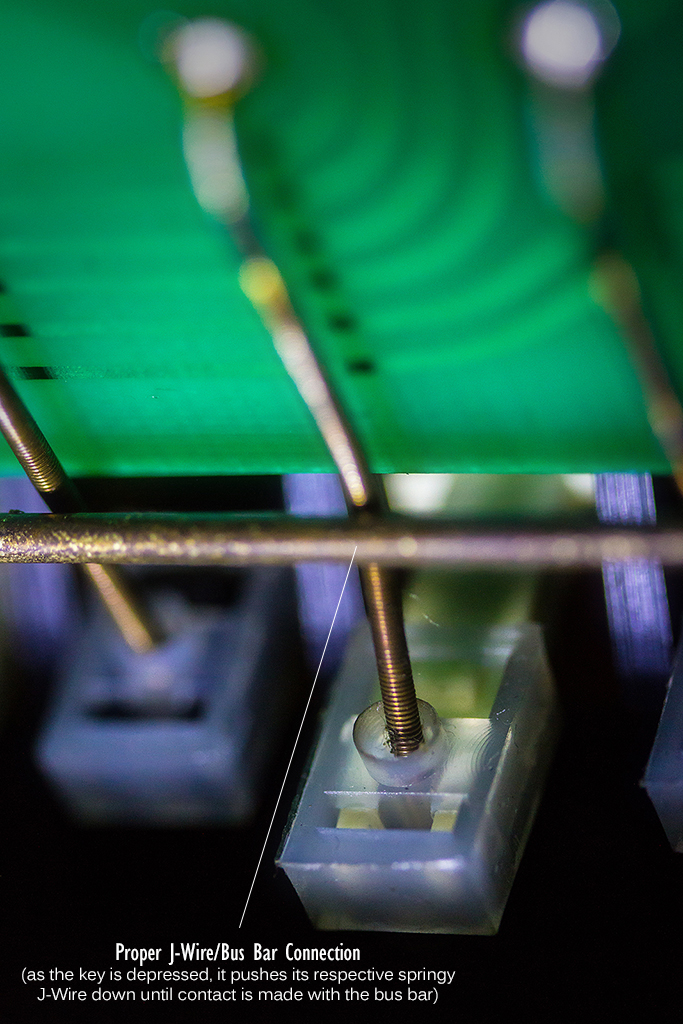
6. Repairing and Cleaning the J-Wire and Bus Bar Assembly.
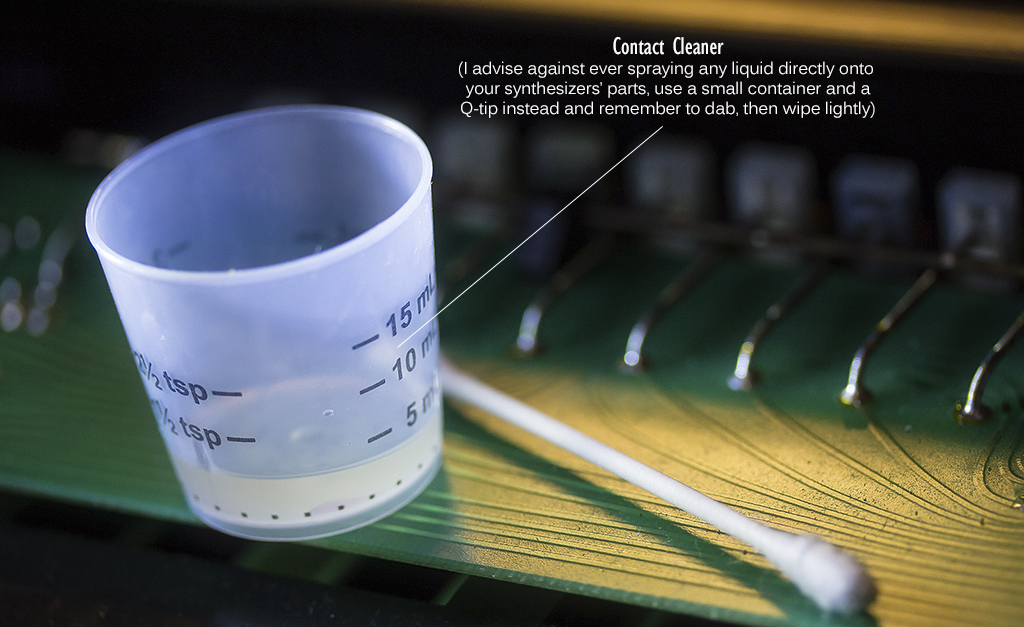
Fortunately the OSCar uses a type of J-Wire system for its keybed, although I was not sure until I actually opened the case. These systems are relatively easy to repair and clean, as seen in the images below. I use a simple contact cleaner such as Electra-X, sprayed into a small cup and dabbed onto the affected area with a Q-tip, then wiped with a dry Q-tip. The secret to cleaning with Q-tips is to DAB more than you WIPE, either when washing or drying. WIPING too much will leave Q-Tip fibers under connectors, so try to DAB. I advise against EVER spraying any type of cleaner or liquid directly onto your synthesizers' parts!
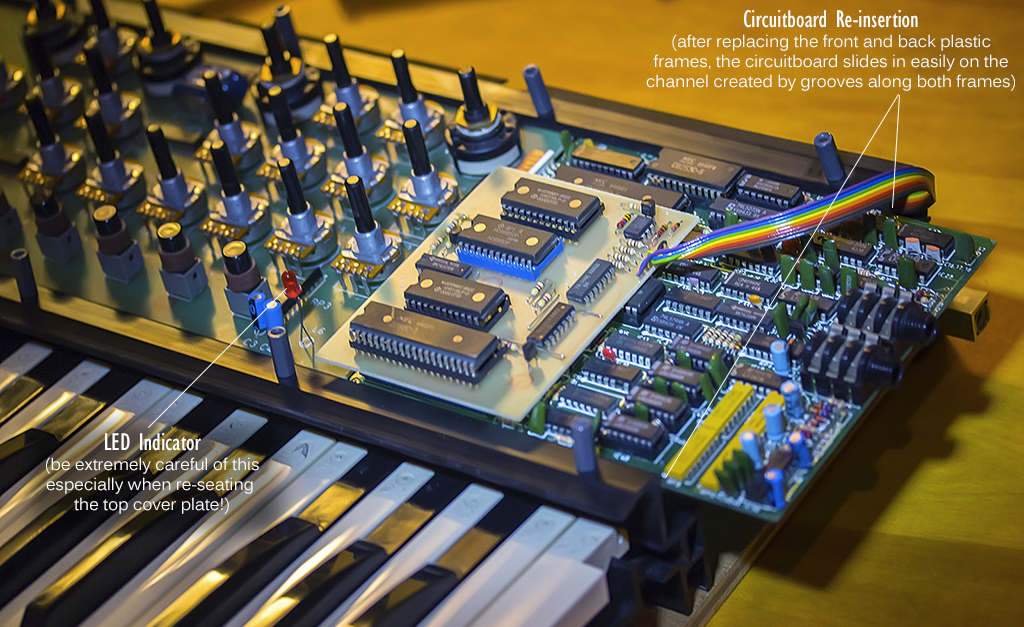
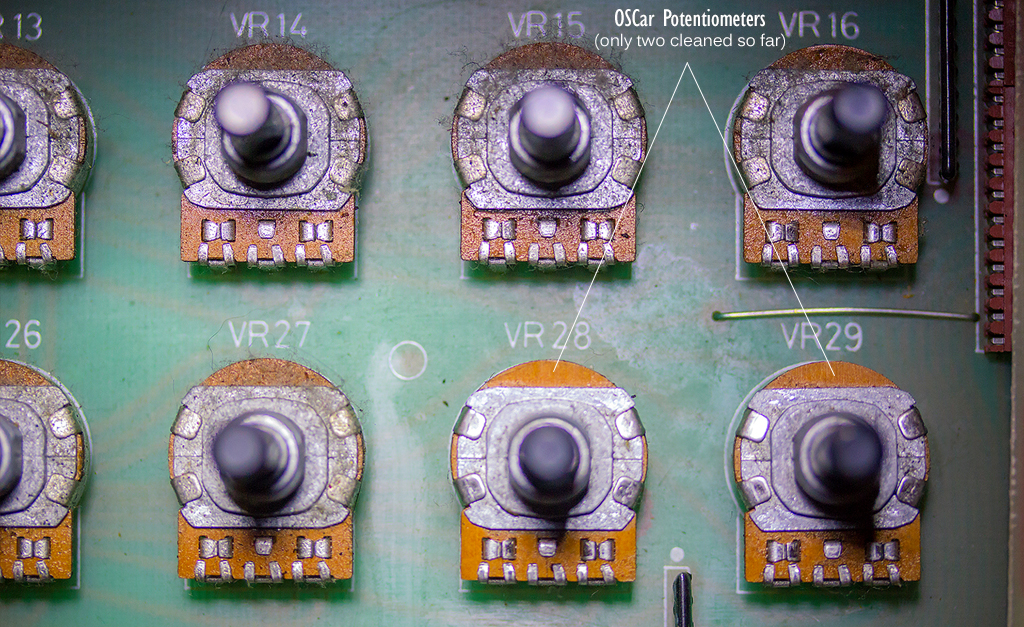
7. Cleaning the Circuitboard.
This is fairly straightforward, simply use the contact cleaner to clean all the outer potentiometers in the same manner as the J-Wire assembly, and use a potentiometer solution for internal cleaning. (DeOXIT Pot and Switch Cleaner for example)

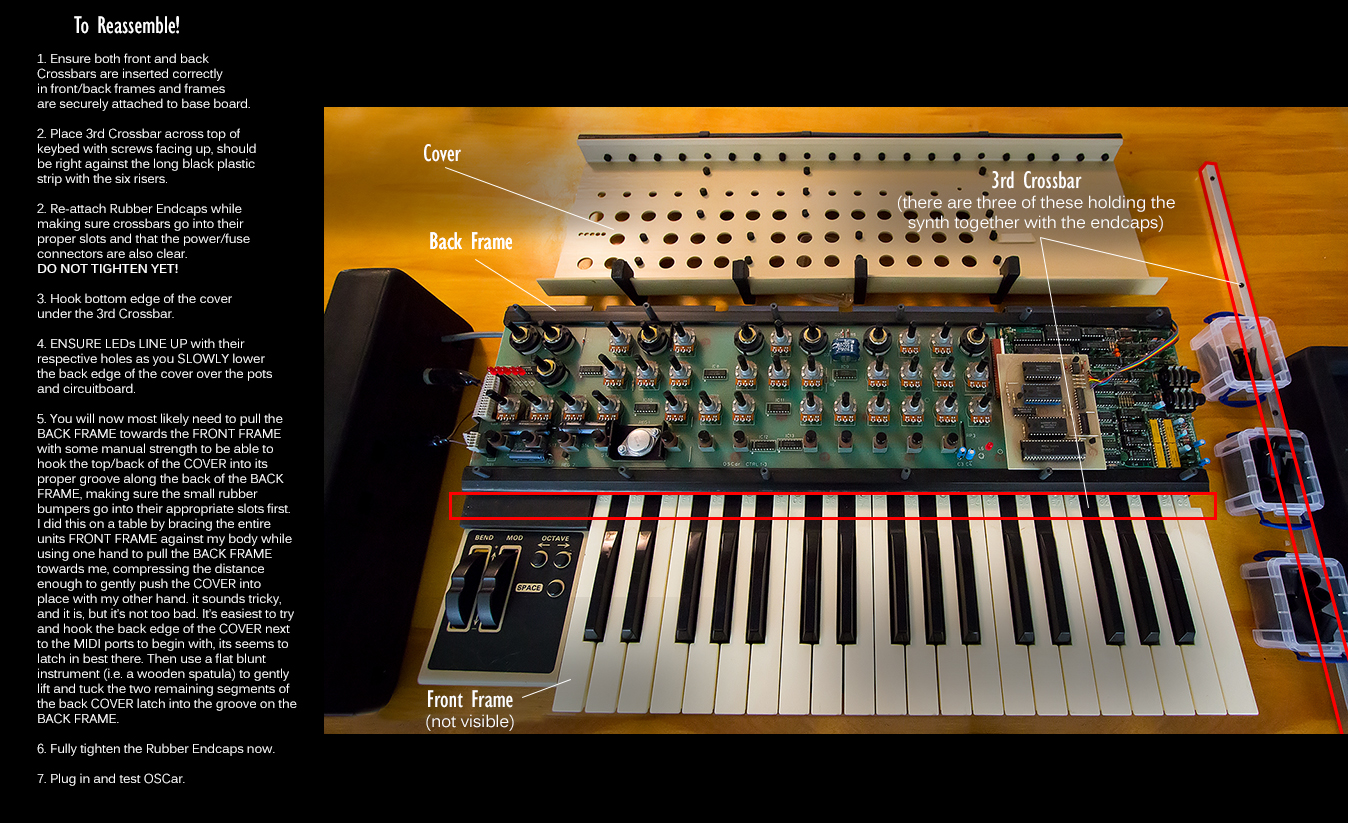
8. Re-Assembly
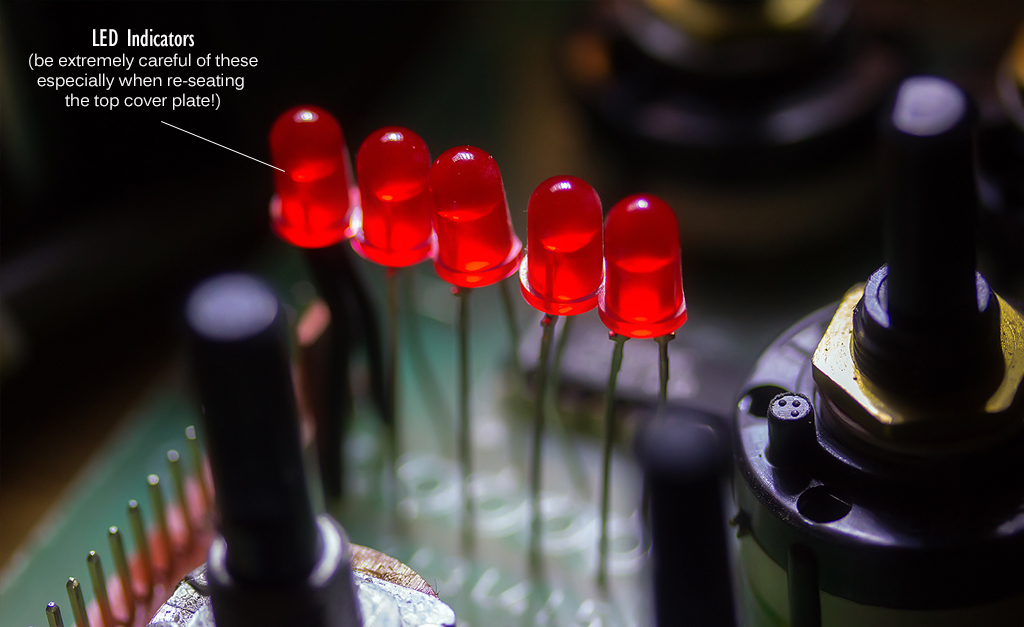
OK, here is the tricky part. This beastie is far easier to take apart than it is to put back together, partially due to its organic design. But a little patience and a little muscle will see you through! The last image has all the most important information so PAY ATTENTION and don't forget to re-attach the power and keyboard connectors to the circuitboard before putting the endcaps and cover back on. :)